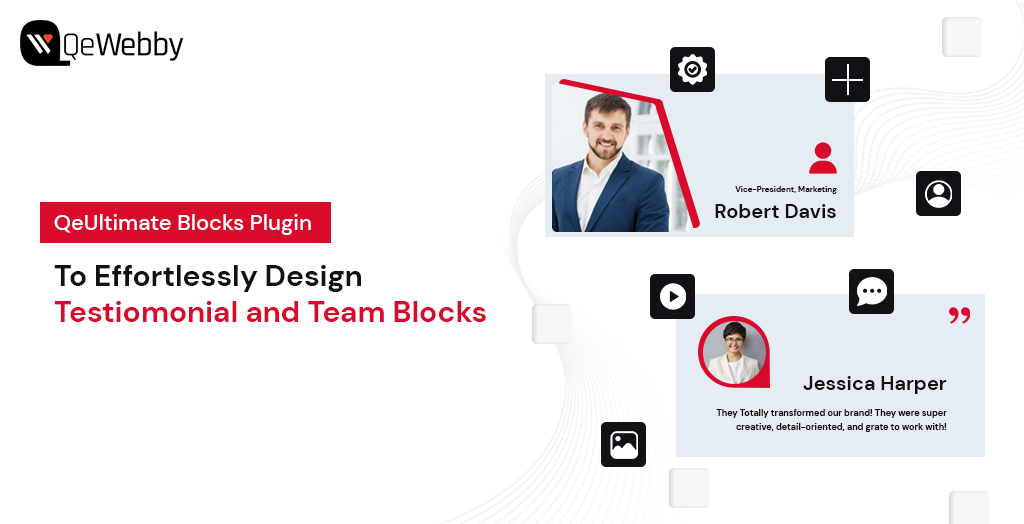
The QeUltimate Blocks Plugin for WordPress is a game-changer for anyone looking to create stunning, functional web pages with ease. Designed to enhance the Gutenberg editor, this plugin offers a variety of customizable blocks for testimonial and team member display that can transform your website without the need for complex coding or expensive design services.
Whether you’re a blogger, a business owner, or a creative professional, QeUltimate Blocks empowers you to craft pages that are not only aesthetically pleasing but also incredibly user-friendly. With an array of options to customize fonts, colors, backgrounds, and more, you have full control over every design element. Plus, the intuitive drag-and-drop interface means you can build and arrange your pages in no time, focusing on what you do best—creating outstanding content.
But that’s not all. QeUltimate Blocks enhances the visitor experience with features that promote easy navigation and engagement, such as interactive buttons and forms. Fully compatible with WordPress, this plugin seamlessly integrates with your existing setup, allowing you to easily expand your site’s capabilities.
Benefits of Using QeUltimate Blocks Plugin
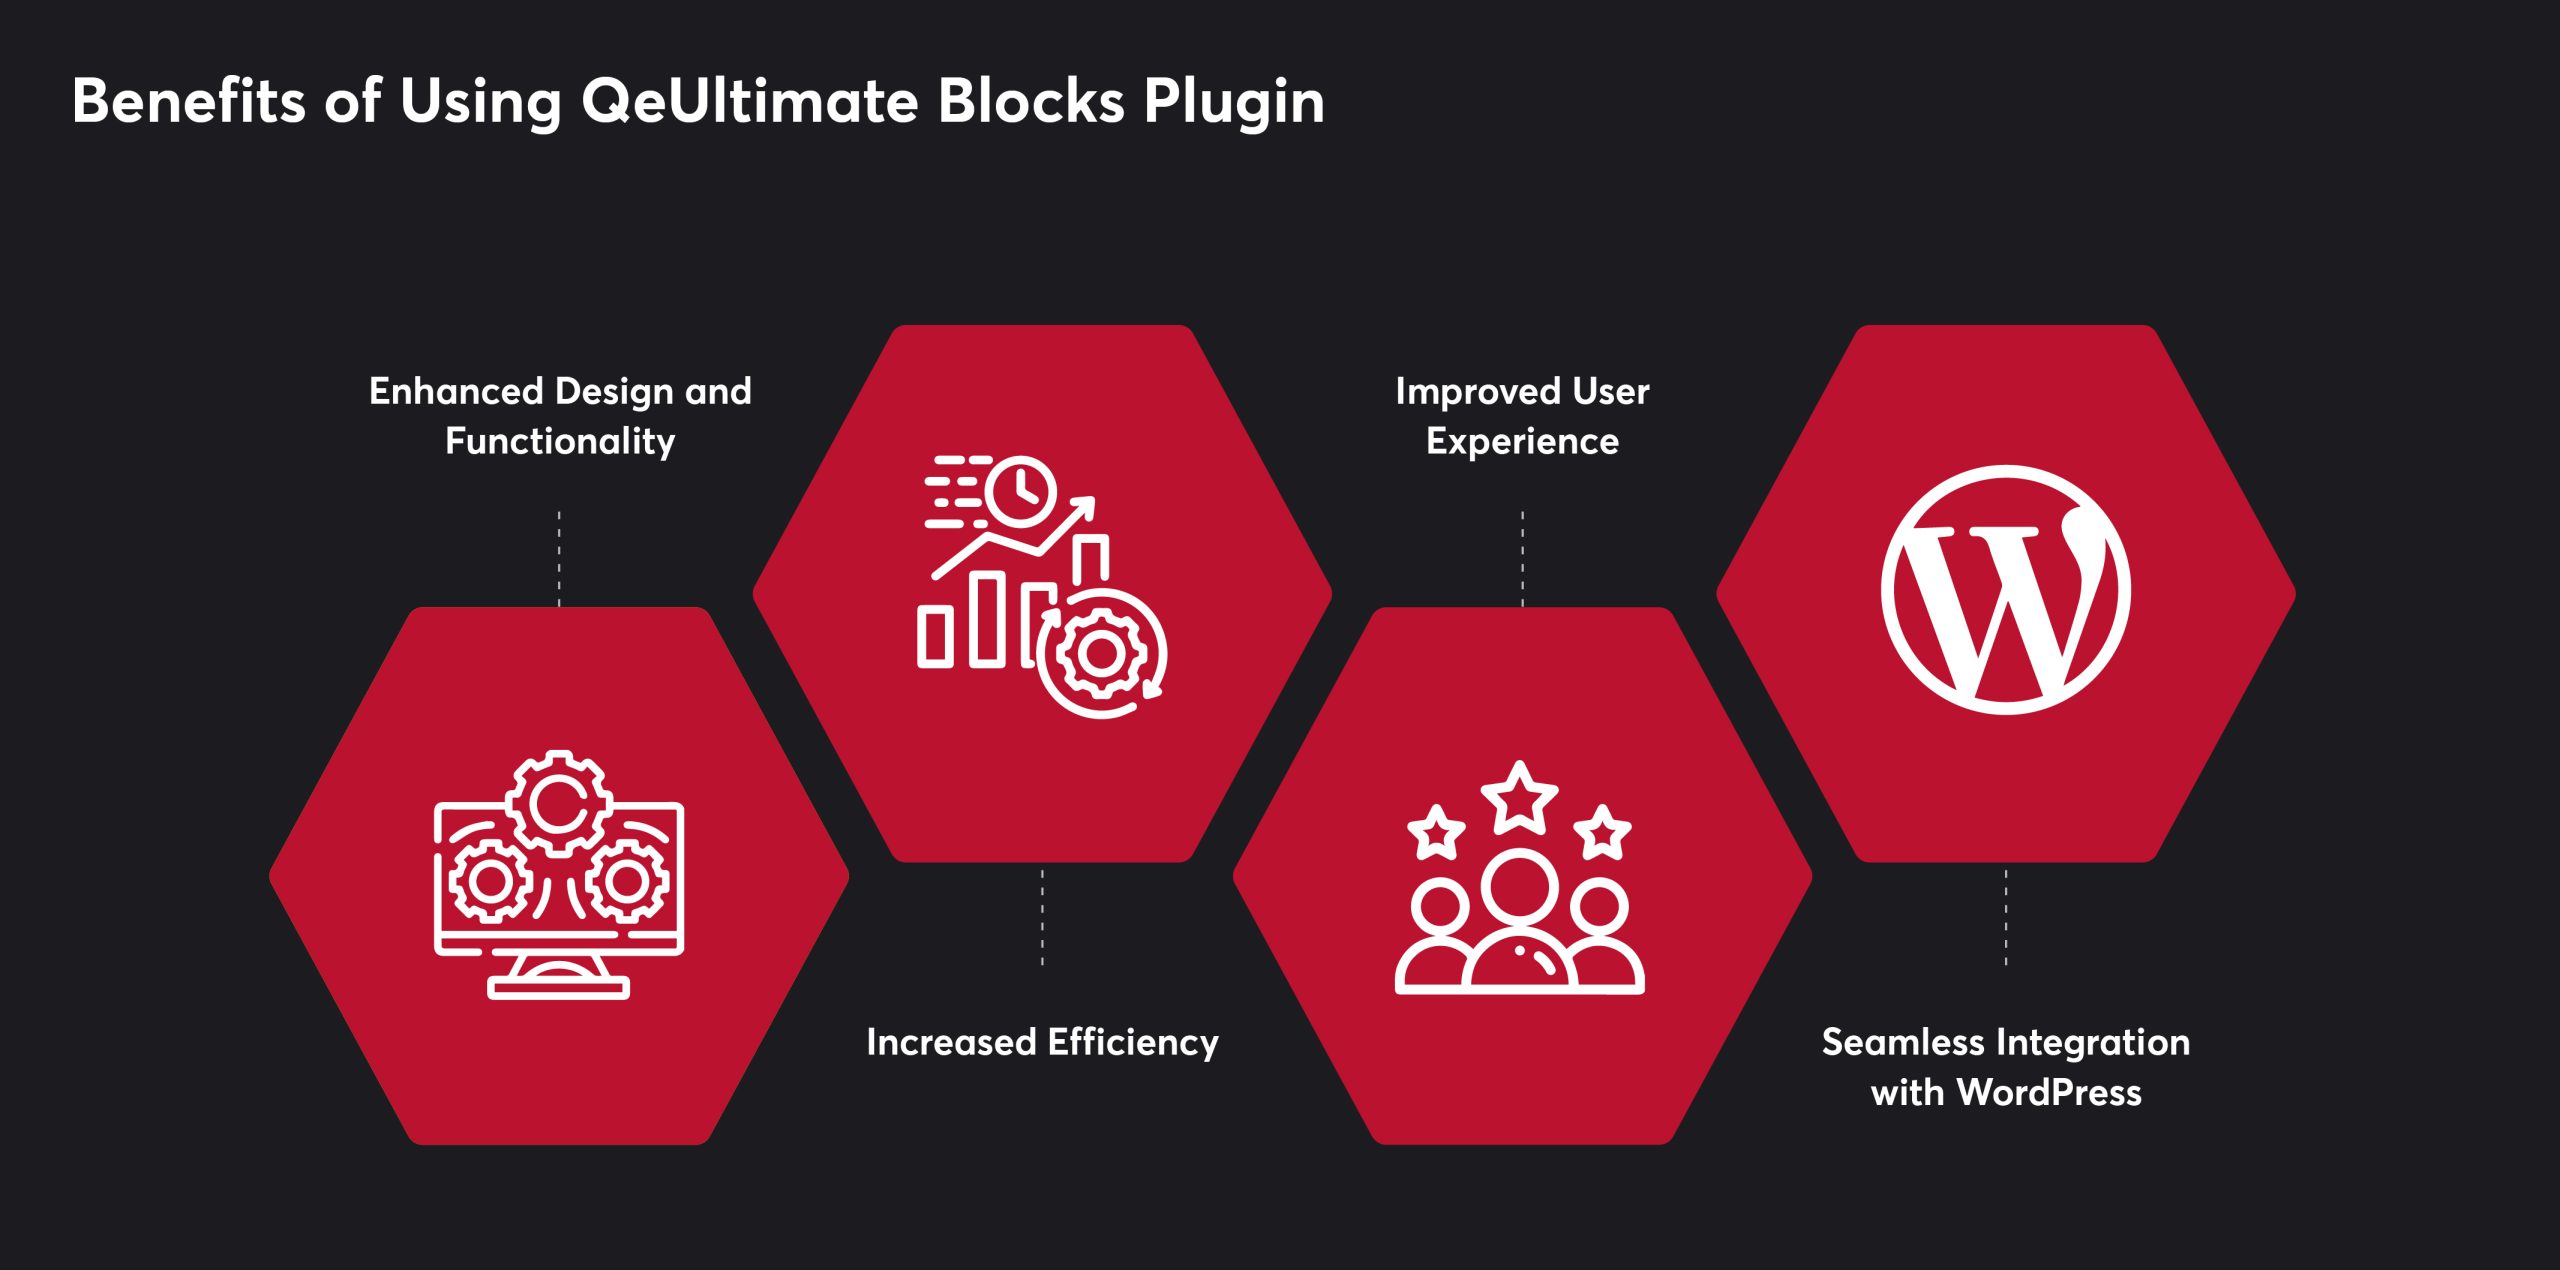
The QeUltimate Blocks Plugin significantly improves website design and functionality. With a variety of customizable blocks, users can create visually appealing and user-friendly pages. The plugin offers easy customization of fonts, colors, backgrounds, and other design elements, giving users complete control over their website’s appearance.
QeUltimate Blocks streamlines the page creation process with its intuitive drag-and-drop interface. Users can quickly add and arrange blocks without coding or technical skills, saving time and effort. This efficiency allows users to focus more on creating quality content for their website.
The plugin enhances the user experience by making website navigation and readability straightforward. Visitors can easily find the information they need, and interactive elements such as buttons and forms help increase user engagement and drive conversions.
QeUltimate Blocks is fully compatible with WordPress, making it easy to integrate into existing websites. Users can install the plugin directly from the WordPress repository and start building pages immediately. Additionally, the plugin works seamlessly with other WordPress plugins, enabling users to add further functionality to your websites.
3 Easy Steps to Add Testimonial and Team Blocks on WordPress Pages
Step 1: Install and Activate QeUltimate Blocks Plugin
Craft Stunning Web Pages –
Get QeUltimate Blocks Plugin for Free!
Whether you want to improve your site’s design, enhance SEO, or add interactive elements, plugins provide a simple solution. One such powerful plugin is the QeUltimate Blocks Plugin, designed to help you effortlessly create stunning and functional pages. Here’s a detailed guide on how to install and activate the QeUltimate Blocks Plugin.
Log in to Your WordPress Dashboard: Open your web browser and navigate to your WordPress admin panel by adding /wp-admin to your site’s URL (e.g., www.yoursite.com/wp-admin). Enter your username and password to log in.
Go to Plugins: Once logged in, look at the menu on the left-hand side of the dashboard. Find and click on “Plugins” to open the Plugins management page.
Add New Plugin: At the top of the Plugins page, you will see a button labeled “Add New.” Click on this button to navigate to the Add Plugins page where you can search for and install new plugins.
Install the Plugin: Once you find the QeUltimate Blocks Plugin in the search results, click the “Install Now” button next to it. The installation process will begin, and the button will display a progress indicator.
Activate the Plugin: After the plugin has been installed, the “Install Now” button will change to “Activate.” Click on the “Activate” button to enable the plugin on your WordPress site.
Confirmation: After activation, you will be redirected back to the Plugins page, and a message at the top will confirm that the QeUltimate Blocks Plugin has been successfully activated.
Step 2: Explore and Utilize QeUltimate Blocks Features
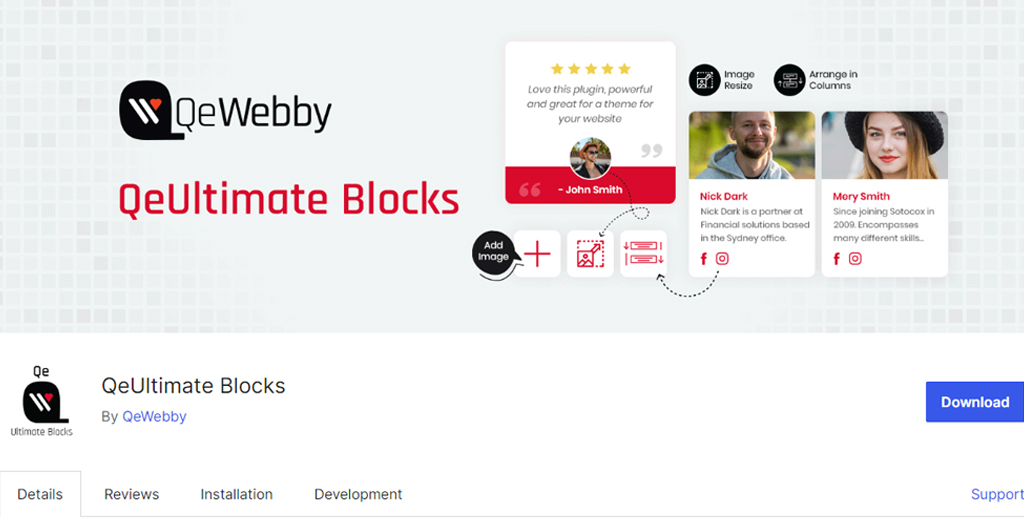
Now that you have installed and activated the QeUltimate Blocks Plugin, it’s time to explore its powerful features and see how you can utilize them to create stunning and functional web pages. QeUltimate Blocks provides a diverse set of blocks designed to meet various needs, including content structuring, interactivity, and visual enhancement. Here are some of the key blocks you can use:
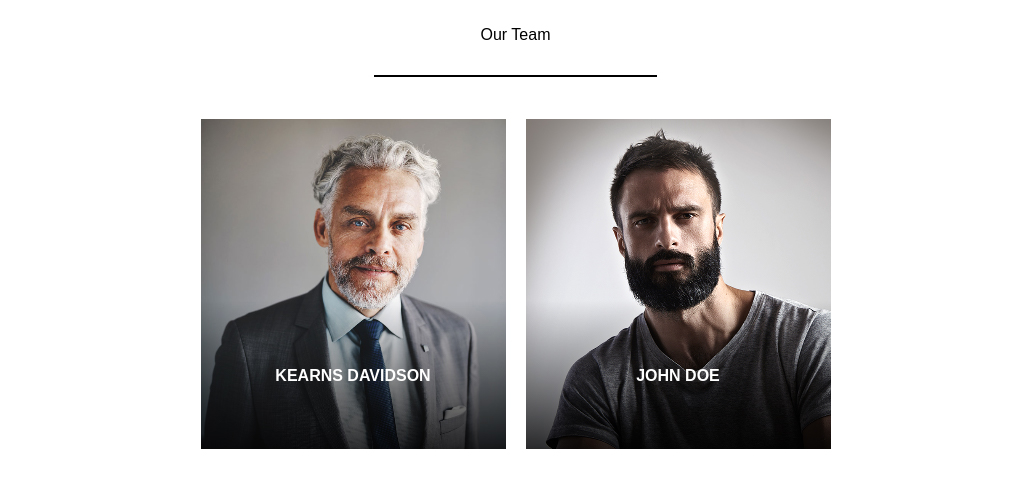
Key Block: Team Members
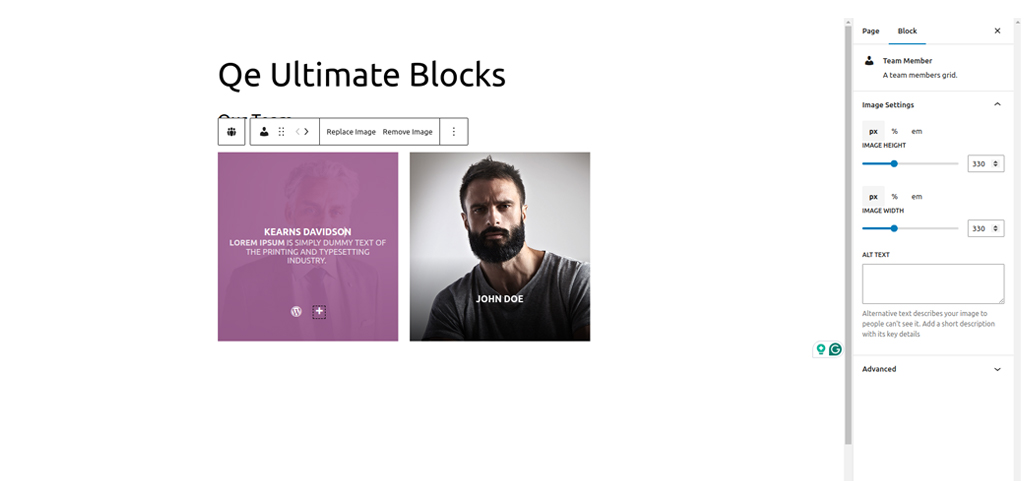
The “Team Members” block is a powerful feature of the QeUltimate Blocks Plugin that enables you to create an attractive section dedicated to showcasing your team. This block is perfect for highlighting the individuals behind your business, project, or organization, adding a personal touch to your website. The basic features include:
- Customizable Layouts: Choose from various layout options to best display your team members.
- Profile Information: Include names, positions, bios, and social media links.
- Images and Styles: Add profile pictures and customize the design to match your site’s aesthetics.
- Responsive Design: Ensure your team section looks great on all devices, from desktops to mobile phones.
Here is a step-wise guide to implement:
Go to the Post/Page Editor: From your WordPress dashboard, navigate to Posts or Pages and create a new post/page or edit an existing one.
Open the Block Inserter: In the Gutenberg editor, click on the “+” button to open the Block Inserter menu.
Find the Team Members Block: Scroll through the QeUltimate Blocks section or use the search bar to locate the “Team Members” block.
Add the Block: Click on the “Team Members” block to add it to your post or page.
Customize the Block: Once added, you can customize the block using the settings panel on the right-hand side of the editor. Here’s how:
-
-
Add Team Members: Start by adding individual team members. For each member, you can input their name, position, and a brief bio.
-
Profile Pictures: Upload profile pictures for each team member to add a personal touch.
-
Social Media Links: Include links to social media profiles or personal websites. You can add icons for platforms like LinkedIn, Twitter, and Facebook.
-
Layout Options: Choose from different layout styles, such as grid or list, to best present your team members.
-
Styling Options: Customize colors, fonts, and spacing to ensure the section aligns with your website’s design.
-
Arrange Team Members: Drag and drop team members to arrange them in the desired order. This helps highlight key individuals or create a logical flow.
-
-
Preview Your Page: Click the “Preview” button to see how the team section looks. Check for any adjustments needed to ensure it is visually appealing and informative.
-
Publish Your Page: Once you are satisfied with the design and layout, click the “Publish” button to make your page live.
Key Block: Testimonials
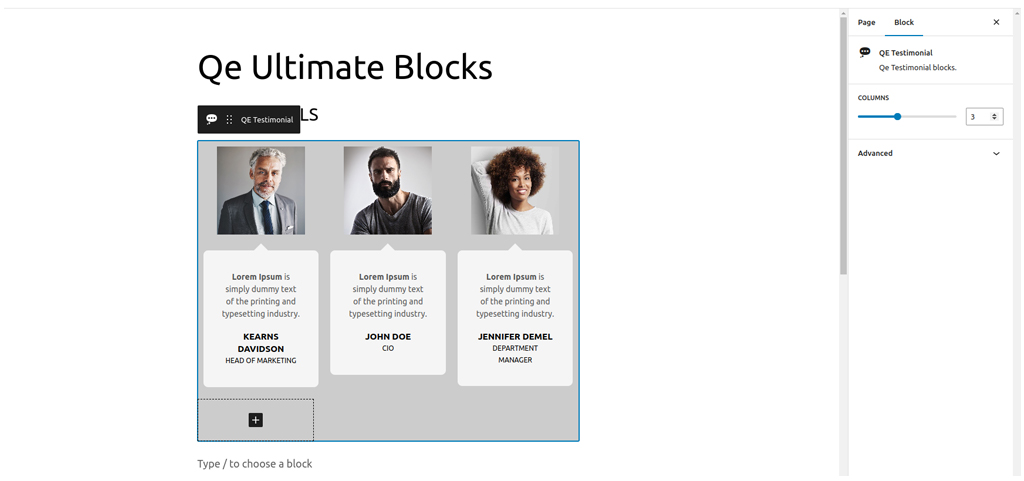
The “Testimonials” block is an essential feature for showcasing positive feedback from your customers. Testimonials serve as social proof, helping to establish trust and encouraging potential customers to engage with your business. The QeUltimate Blocks Plugin makes it easy to create and customize testimonial sections that stand out. The basic features include:
- Customizable Layouts: Choose from various layout options, including grid, slider, and list formats.
- Profile Information: Display the name, position, company, and photo of each testimonial provider.
- Styling Options: Customize colors, fonts, backgrounds, and borders to match your website’s design.
- Responsive Design: Ensure testimonials look great on all devices, from desktops to mobile phones.
Here is a step-wise guide to implement:
-
Go to the Post/Page Editor: From your WordPress dashboard, navigate to Posts or Pages and either create a new post/page or edit an existing one.
-
Open the Block Inserter: In the Gutenberg editor, click on the “+” button to open the Block Inserter menu.
-
Find the Testimonials Block: Scroll through the QeUltimate Blocks section or use the search bar to locate the “Testimonials” block.
-
Add the Block: Click on the “Testimonials” block to add it to your post or page.
-
Customize the Block: Once added, you can customize the block using the settings panel on the right-hand side of the editor. Here’s how:
-
-
Add Testimonials: Start by adding individual testimonials. For each testimonial, input the customer’s name, position, company, and their feedback.
-
Profile Pictures: Upload a photo of the customer to add authenticity and a personal touch.
-
Layout Options: Choose the layout style that best fits your design—grid for a clean, structured look, slider for a dynamic presentation or list for a straightforward approach.
-
Styling Options: Adjust colors, fonts, and backgrounds to ensure the testimonial section aligns with your website’s overall design. You can also add borders and shadow effects to enhance the visual appeal.
-
Display Options: Customize how many testimonials to display at a time and whether to include navigation arrows or dots if using a slider layout.
-
Arrange Testimonials: Drag and drop testimonials to rearrange their order as needed. Highlight the most impactful testimonials at the top for maximum effect.
-
Preview Your Page: Click the “Preview” button to see how the testimonial section looks on your site. Ensure it is visually appealing and the text is easy to read.
Publish Your Page: Once you are satisfied with the design and layout, click the “Publish” button to make your page live.
Step 3 Design and Publish Your Stunning Page
You are now ready to design and publish your stunning WordPress page. This final step involves putting together all the elements you’ve customized, arranging them for the best visual impact, and ensuring your page is ready to captivate your audience. Here’s a detailed guide on how to design and publish your beautiful, functional page.
Here is a step-wise guide to implement:
Outline Your Content: Before you start designing, outline the key sections and elements you want on your page. This could include a header, hero image, team section, testimonials, a call-to-action, and footer.
Sketch a Layout: Sketch a rough layout of your page on paper or using a digital tool. This helps you visualize the structure and flow, making it easier to arrange blocks later.
Go to the Post/Page Editor: From your WordPress dashboard, navigate to Posts or Pages and create a new post/page or edit an existing one.
Add a Title: Start by adding a compelling title that clearly conveys the purpose of your page.
Add and Arrange Blocks: Using the “+” button, add the blocks you’ve outlined in your plan. Arrange them in the order that follows your sketched layout. Here are some key sections you might include:
-
Hero Section: Use an Image or Cover block to create a visually striking hero section. Add a headline and a subheadline that grabs attention.
Team Members: Use the Team Members block to introduce your team. Customize it with profile pictures, names, and bios.
Testimonials: Add a Testimonials block to showcase positive feedback. Customize the layout and design for maximum impact.
Call to Action: Use the Call to Action block to encourage visitors to take a specific action, like signing up for a newsletter or contacting you.
Customize Each Block: Adjust the settings for each block to match your design preferences. This includes changing colors, fonts, spacing, and adding background images where needed.
Add Media: Enhance your page with high-quality images, videos, and graphics. Use the Image Slider block for interactive galleries or the Video block to embed engaging video content.
Use Advanced Columns: For a more sophisticated layout, use the Advanced Columns block to create multi-column sections. This can help organize content and improve readability.
Ensure Consistency: Maintain a consistent design throughout your page. Use the same fonts, colors, and styles to create a cohesive look.
Preview Your Page: Click the “Preview” button to see how your page looks on different devices. Check for any alignment issues, broken links, or design inconsistencies.
Optimize for SEO: Use an SEO plugin to optimize your page title, meta description, and content. This helps improve your page’s visibility in search engine results.
Test Functionality: Ensure all interactive elements, like buttons and forms, work correctly. Test any links to make sure they direct to the intended pages.
Save Draft: Before publishing, save your page as a draft. This ensures you don’t lose any work and can make final adjustments.
Publish: Once you’re satisfied with the design and functionality, click the “Publish” button to make your page live. Confirm any prompts to finalize the publication.
Promote Your Page: Share your newly published page on social media, in newsletters, and through other marketing channels to drive traffic.
End Note
The QeUltimate Blocks Plugin offers a range of customizable blocks that cater to various needs, from showcasing team members and displaying testimonials to creating advanced layouts and interactive elements. These features enable you to build professional, user-friendly pages without needing extensive coding skills. Now that you have the knowledge and tools to craft stunning WordPress pages, it’s time to unleash your creativity and make your website stand out. Happy designing!
Enhance your website’s design and functionality effortlessly with the